- Published on
How to Install Wordpress on XAMPP?
Hello everyone, I know that you are facing some problems in installing WordPress on XAMPP. But don't worry this article will teach in detail how to install it. At the end of it, you will have your WordPress site hosted on the XAMPP server.
What is XAMPP Server?
XAMPP is a software distribution which provides the Apache web server, MySQL database (actually MariaDB), Php and Perl (as command-line executables and Apache modules) all in one package. It is available for Windows, MAC and Linux systems. No configuration is necessary to integrate Php with MySQL.
Here's what the alphabets in XAMPP stand for:
- X — cross-platform (X), as it support multiple operating system.
- A — Apache HTTP Server
- M — MeriaDB (formaly MySQL)
- P — PHP
- P — PERL
Why Use XAMPP to install WordPress?
Like all software, wordpress has certain prerequisites to run. The current recommended wordpress requirements are:
- PHP version 7.4 o greater
- MySQL version 5.7 or greater OR MariaDB version 10.2 or greater
- HTTPS support
- Apache OR Nginx server
XAMPP checks all the boxes listed above. It's free, reliable, easy to use, and works on all major platforms. You can't go wrong with it.
How to install XAMPP on Windows 10?
if you want to install XAMPP on window 10 read this How to install XAMPP on Windows 10 carefully and follow all the steps for installing XAMPP server on windows
Note:- Before we get started Wordpress installation, you need to have Xampp running on your computer.
Now I have assumed that you have successfully installed XAMPP on your system. Once you have installed the XAMPP you can easily install WordPress.
Let's start installing WordPress on XAMPP
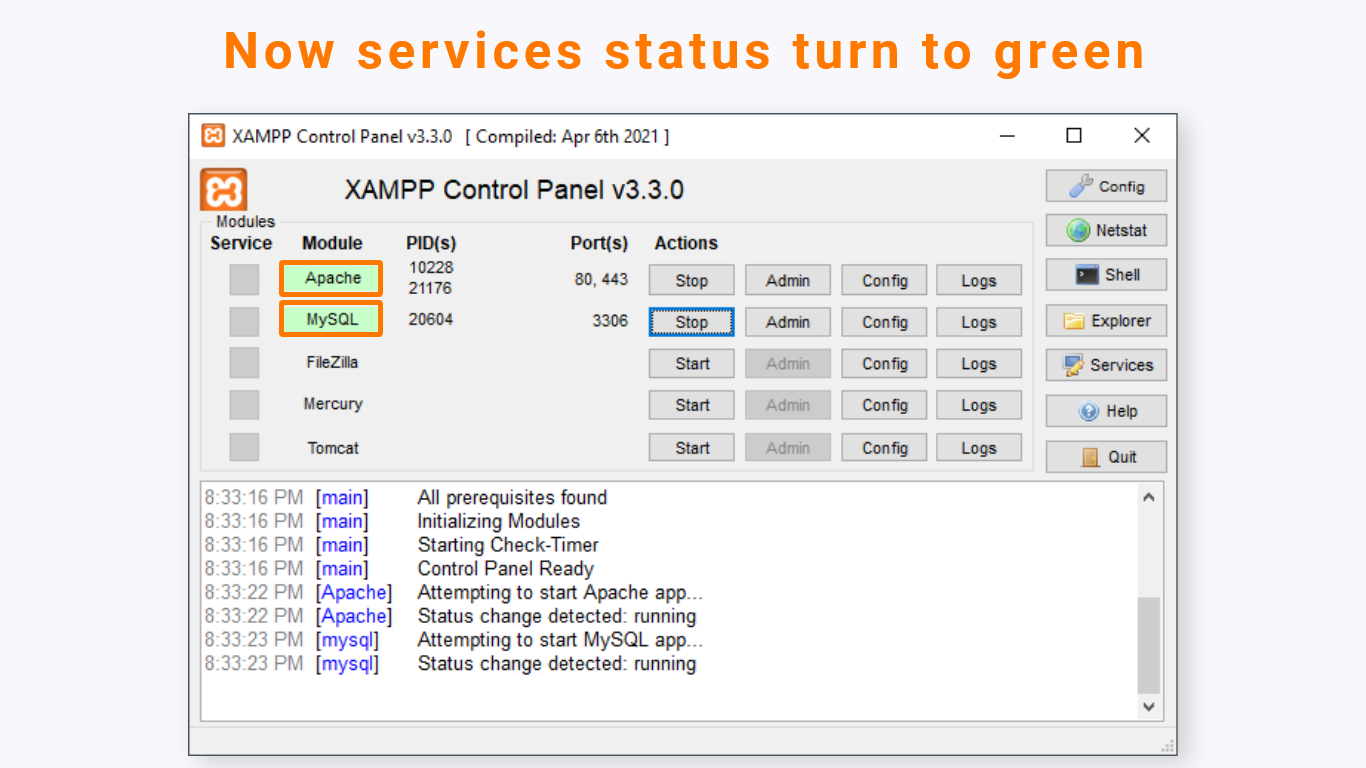
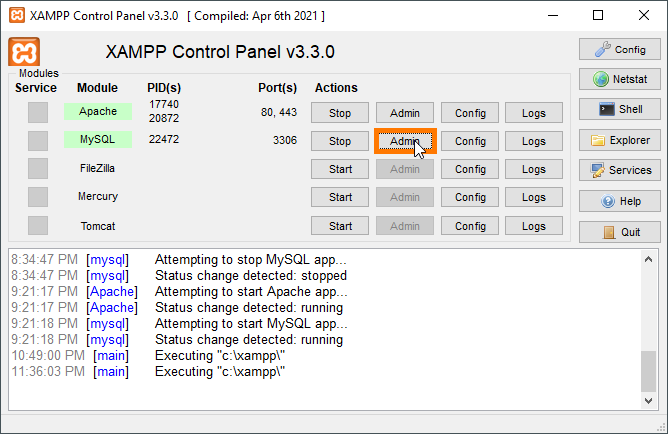
Step 1: Start, Apache and MySQL services from XAMPP control panel
To install wordpress on XAMPP, you'll need to run two services:
- Apache
- MySQL
You can start both services from the XAMPP Control Panel:


Once you start them, you should see their status turn to green color:
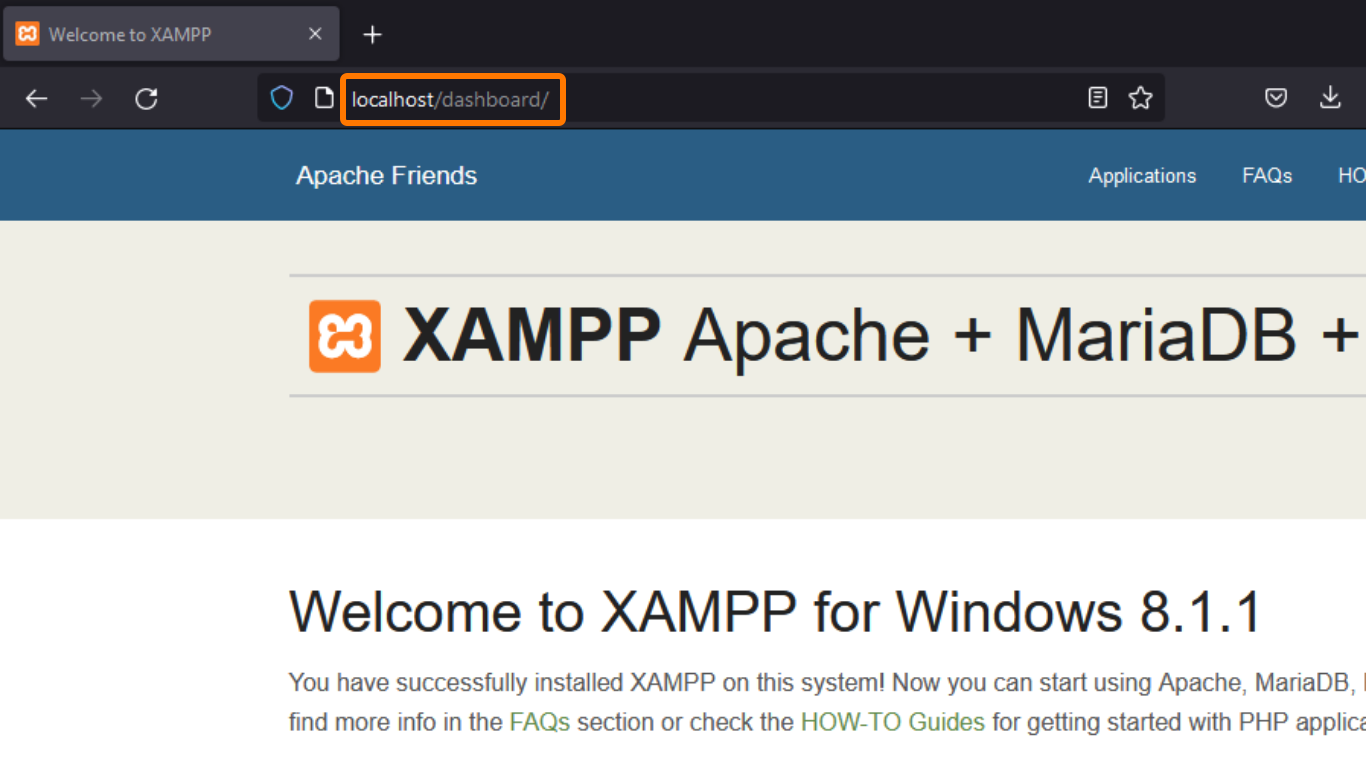
And now you should be able to check that your local server is working by visiting http://localhost/ in your browser. If the server is up and running properly you should see the following screen:
Now it's time to install WordPress on XAMPP. So here's how to set up a WordPress site on a XAMPP server.
Step 2: Host the WordPress on XAMPP
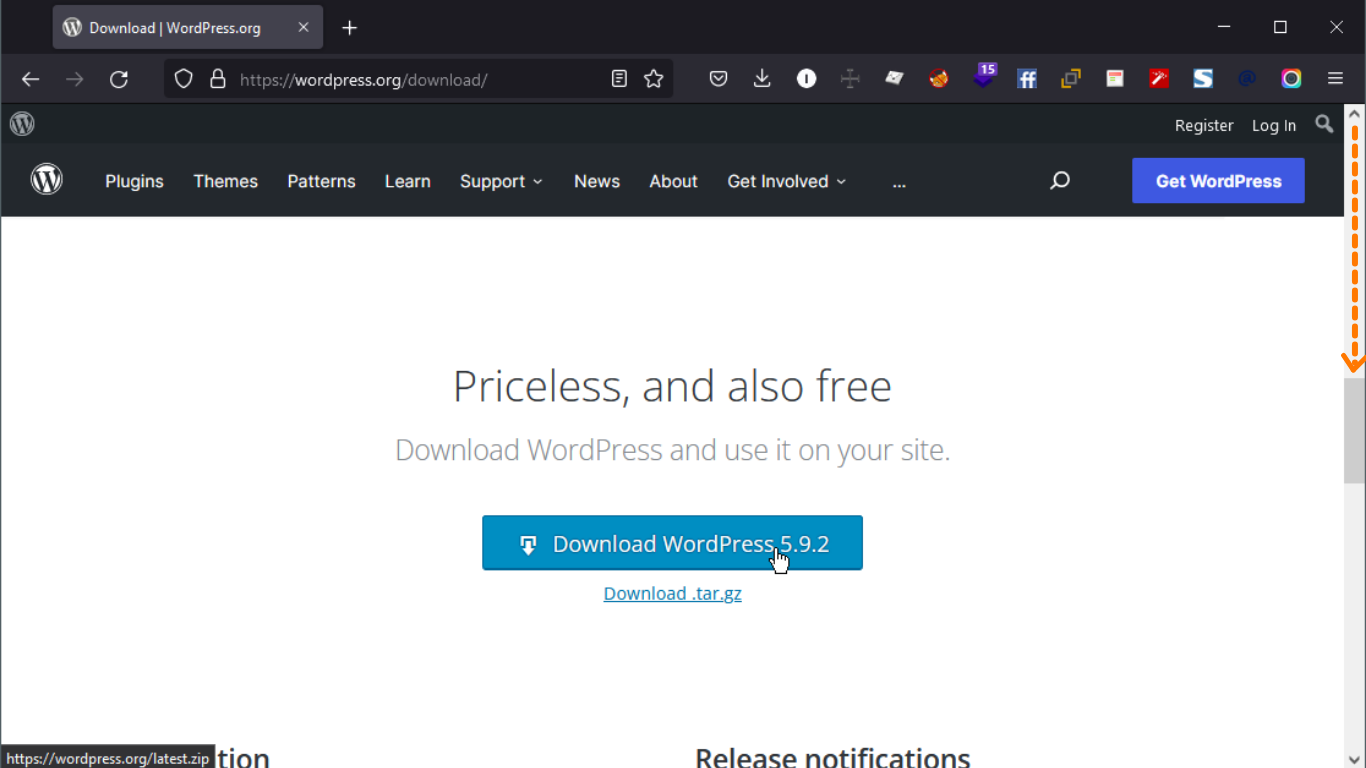
Now you need to go to wordpress.org and download the latest version of WordPress.
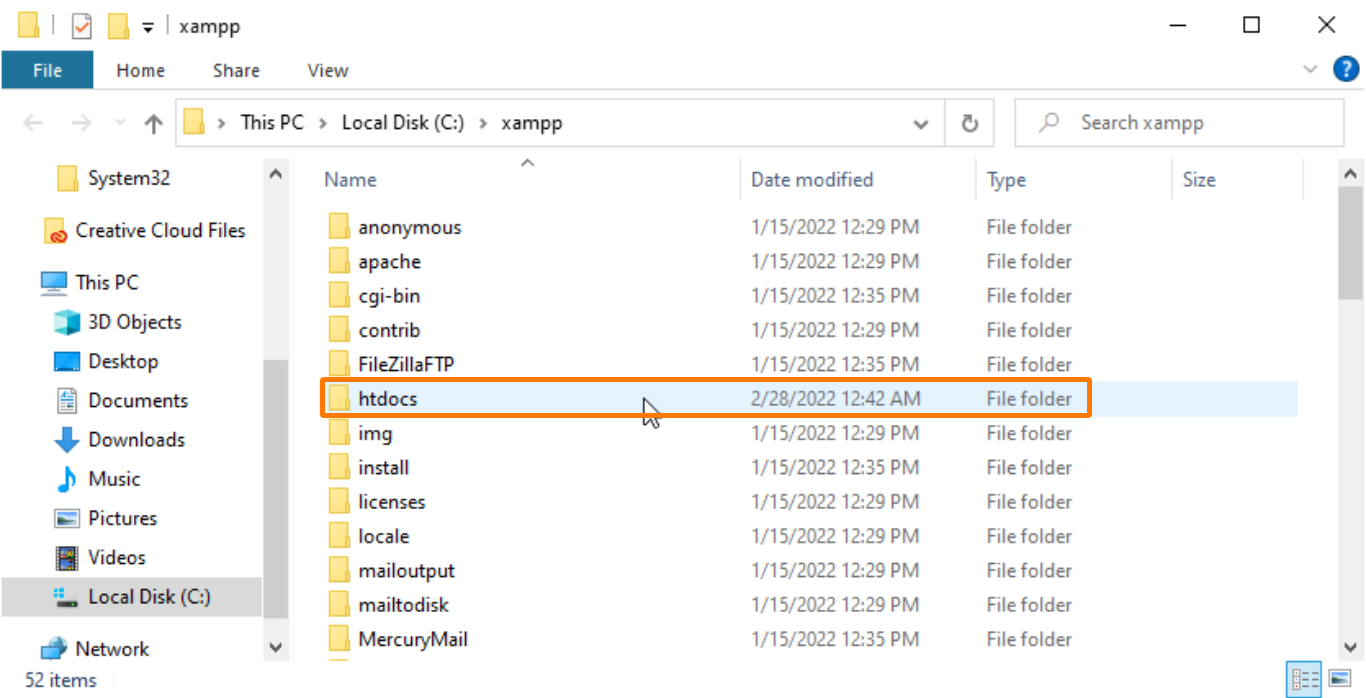
After downloading WordPress, navigate to the XAMPP explorer folder using the XAMPP Control Panel.
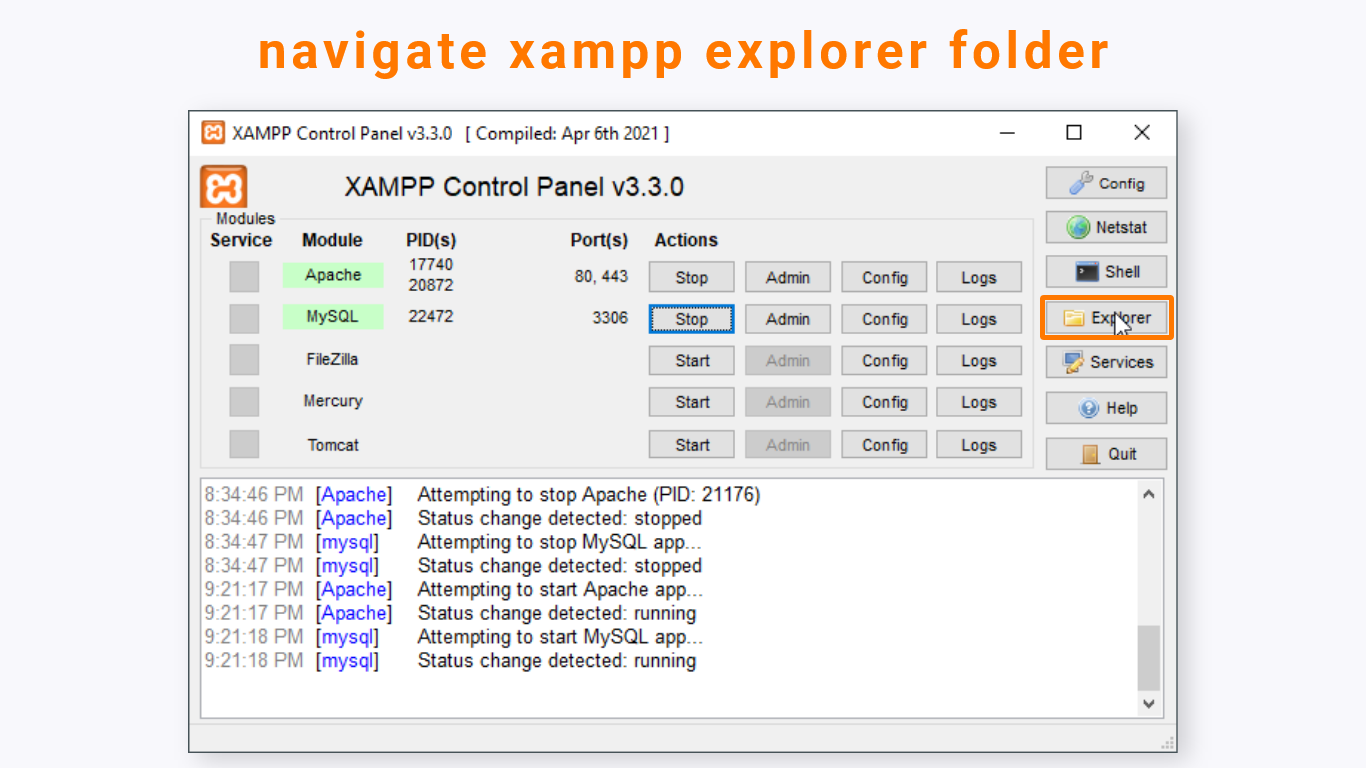
And after going to xampp explorer you will see the htdocs folder there

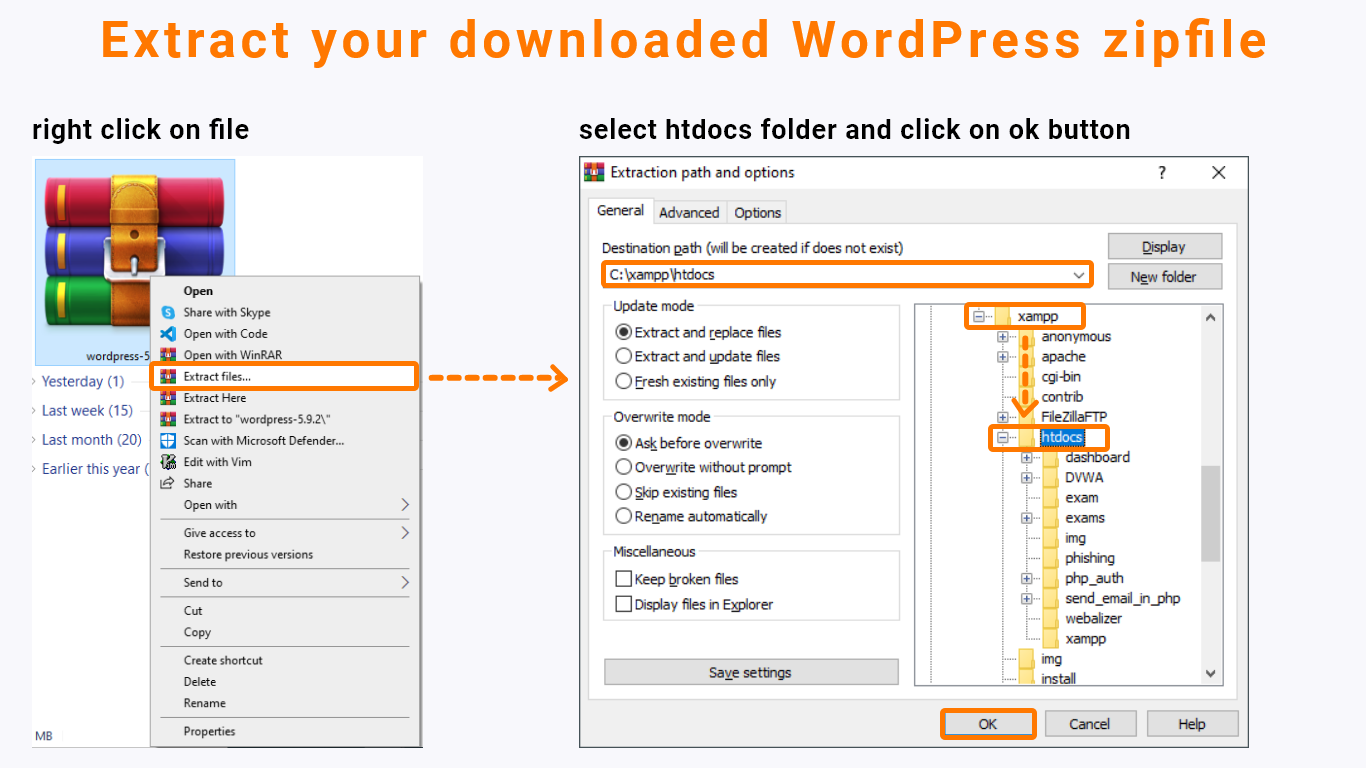
Once you find the htdocs folder, extract the wordpress-<version>-zip file you downloaded from wordpress.org into it:
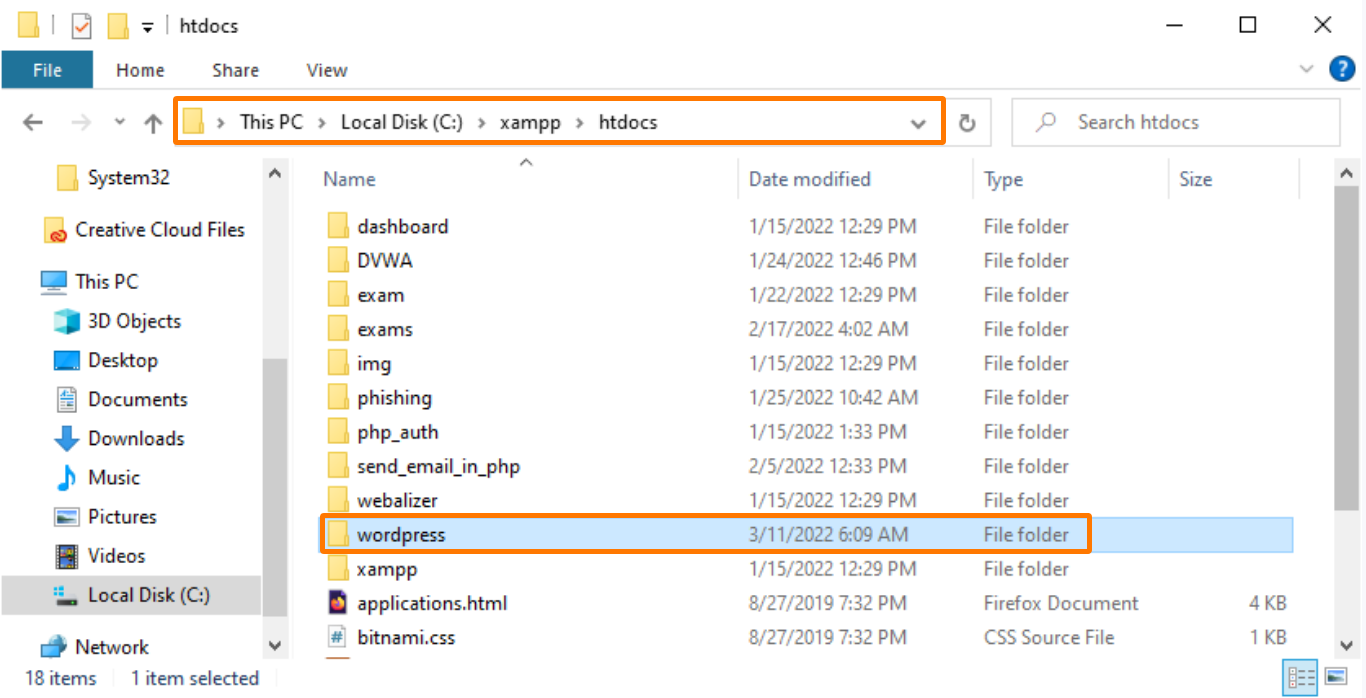
After extracting the WordPress file navigate to the htdocs folder and you will see the wordpress folder.
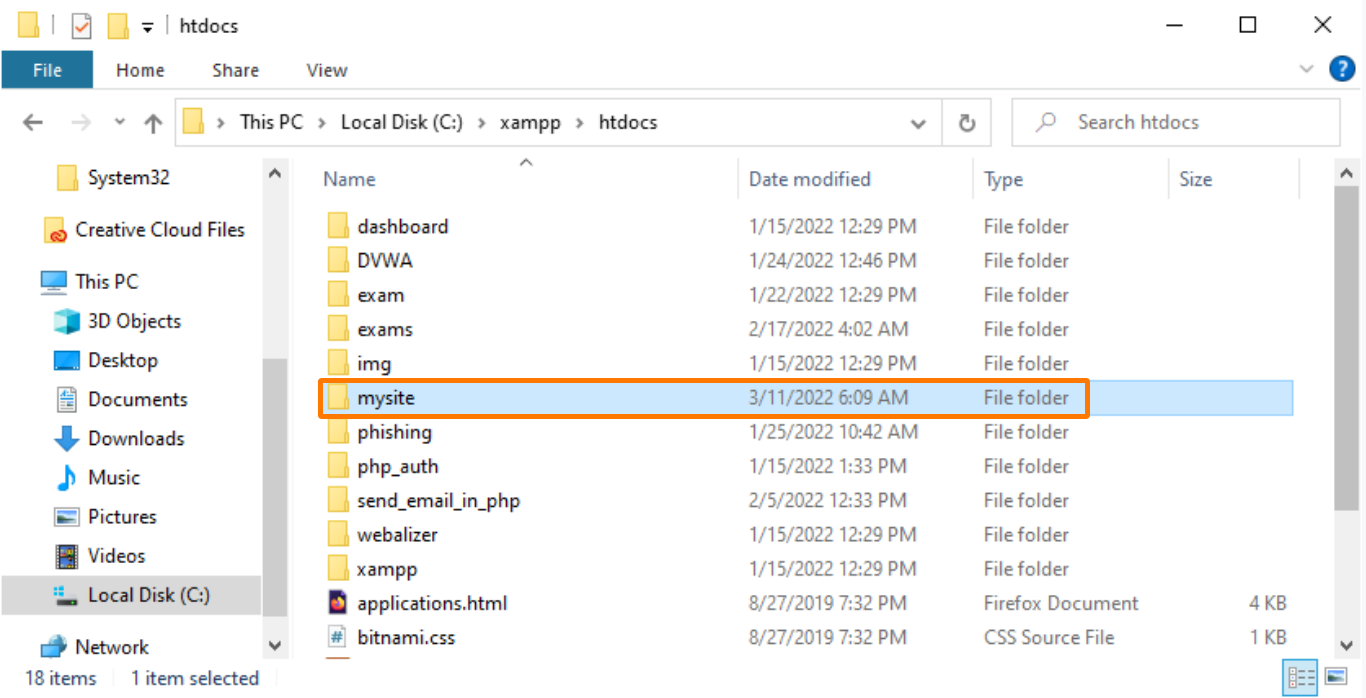
Then, rename this folder. Because this folder name will become the alias used to access your WordPress site. For example, if you rename the 'mysite' folder, you will be able to access your site by going to 'http://localhost/mysite'.
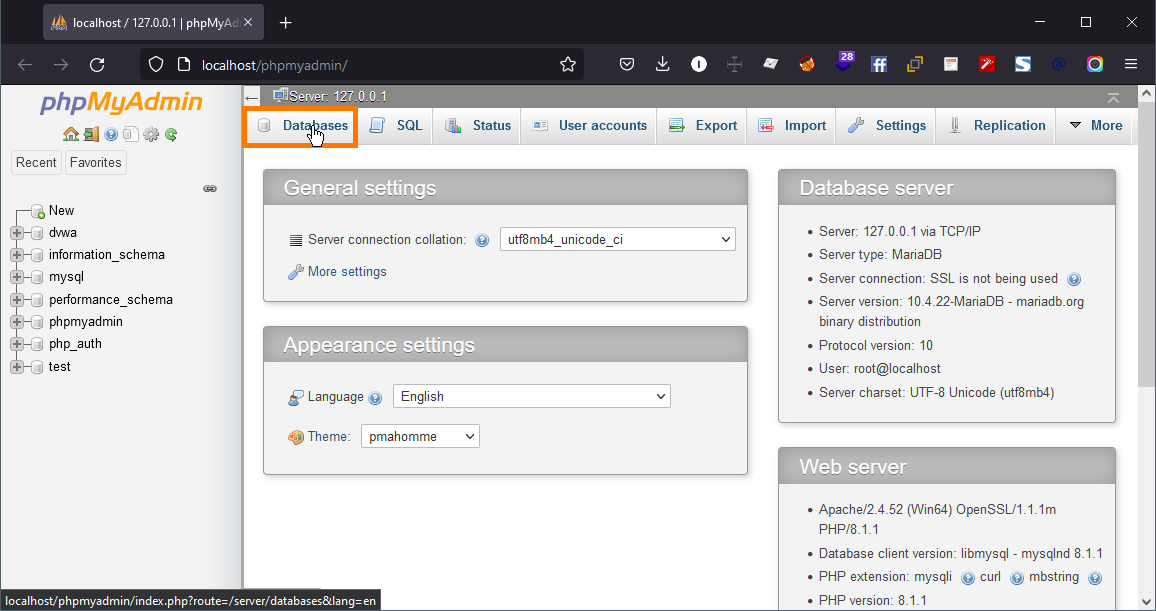
Step 3: Create a database for WordPress
Next, we need a database for WordPress installation. To do this click on the Admin button and launch PHPMyAdmin from your XAMPP control panel:

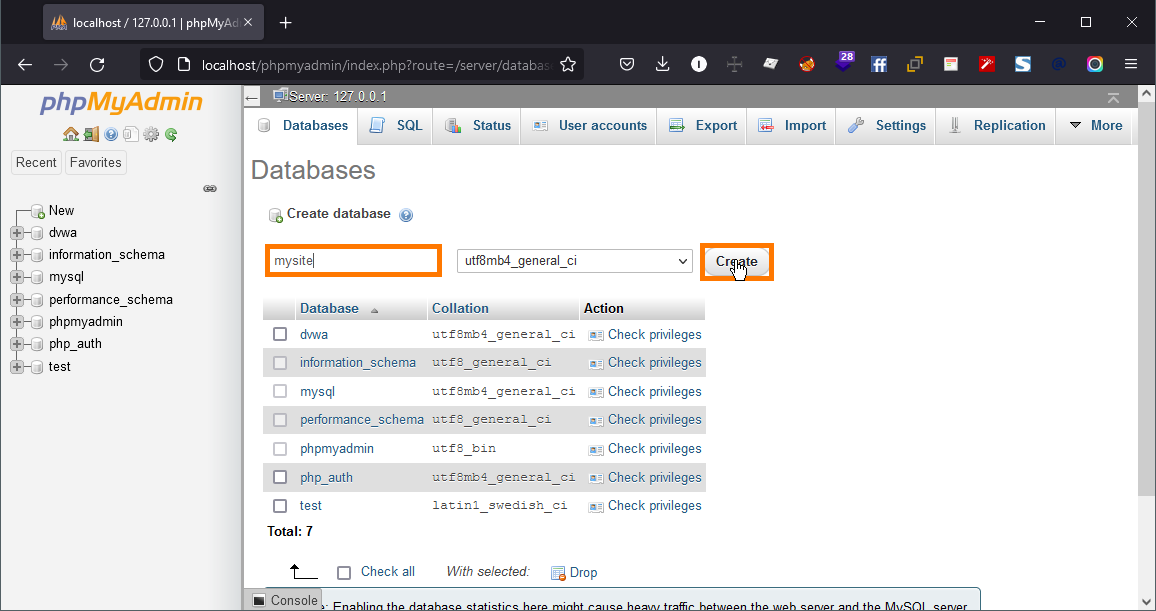
Then, click on Databases at the top

Now enter a name for your Database and click on Create. Your database name can be anything just remember it as you will need it for the next step.
Note:- If you are installing WordPress on live web server then you don't need to worry about creating database
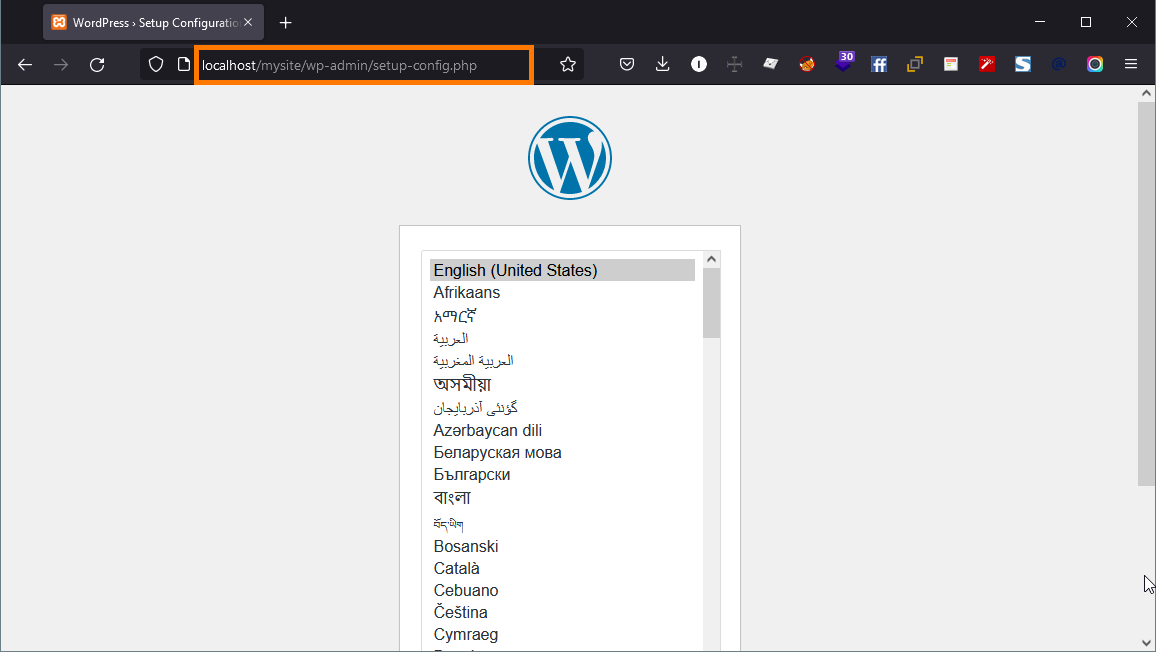
Step 4: Connect Database and install WordPress locally
Remember, your wordpress site address is just http://localhost/FOLDERNAME:
Next, you need to open your favorite web browser and enter the your wordpress site address in your browser's address bar.

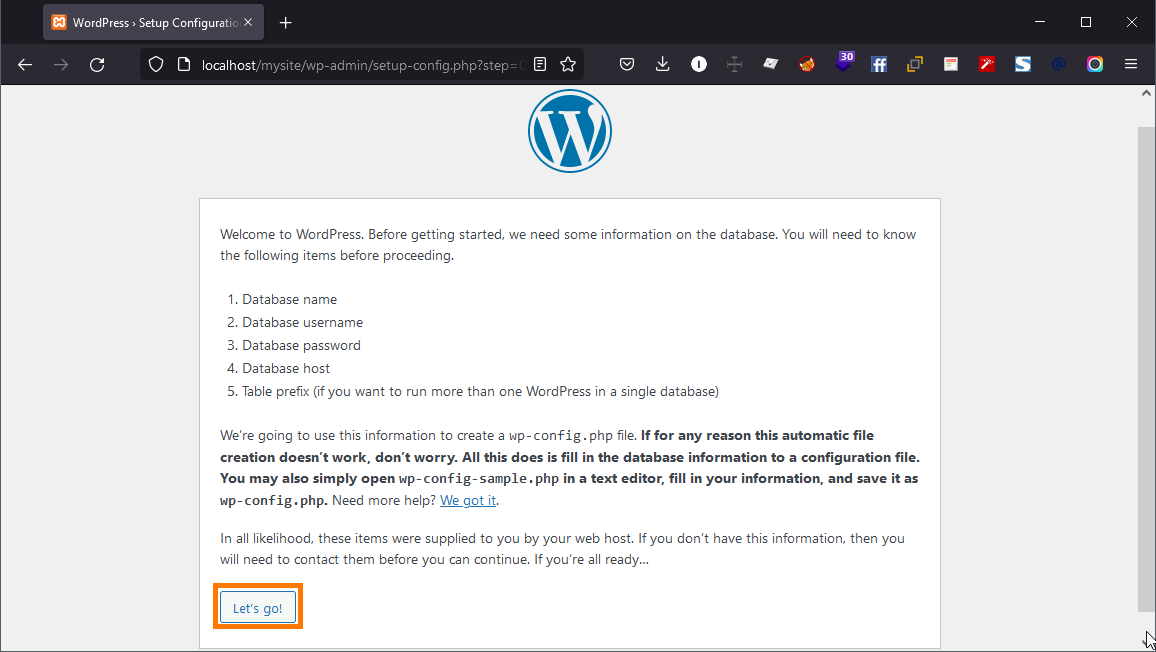
Once you've chosen your language, continue onto the next screen. and this screen inform you before getting install wordpress, we need some information on the database then click on let's go
Next, When you get to the database details, enter them like this:
- Database Name = Name of the database you created in PHPMyadmin
- Username = 'root'
- Password = leave blank
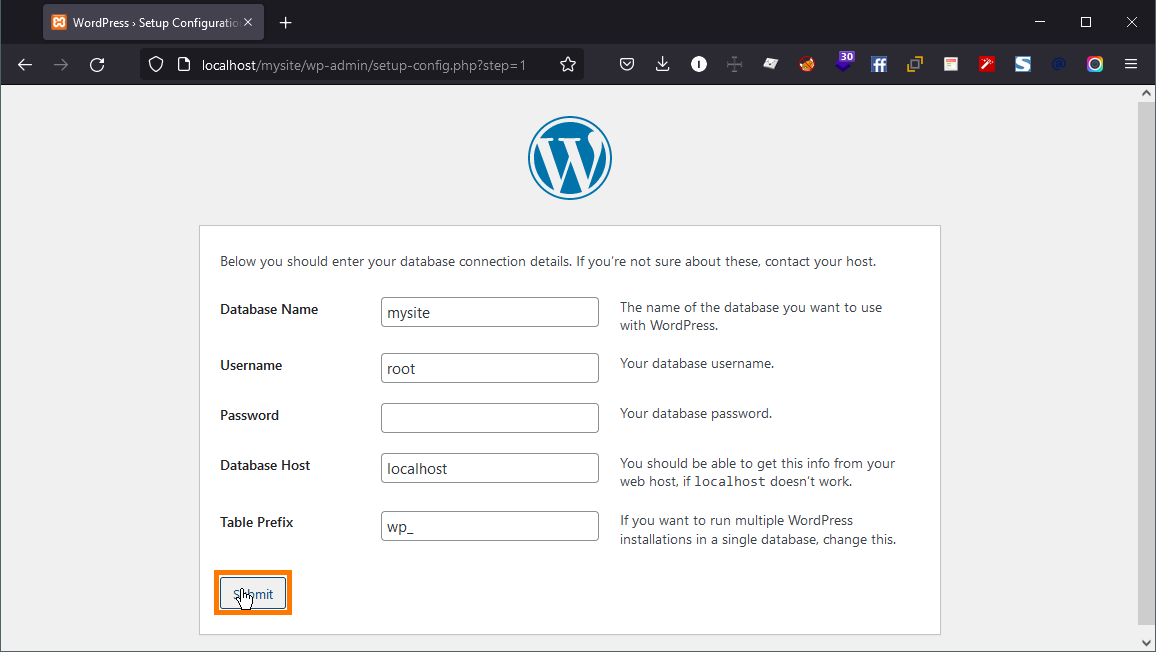
Once you are done, click on the Submit button to continue.
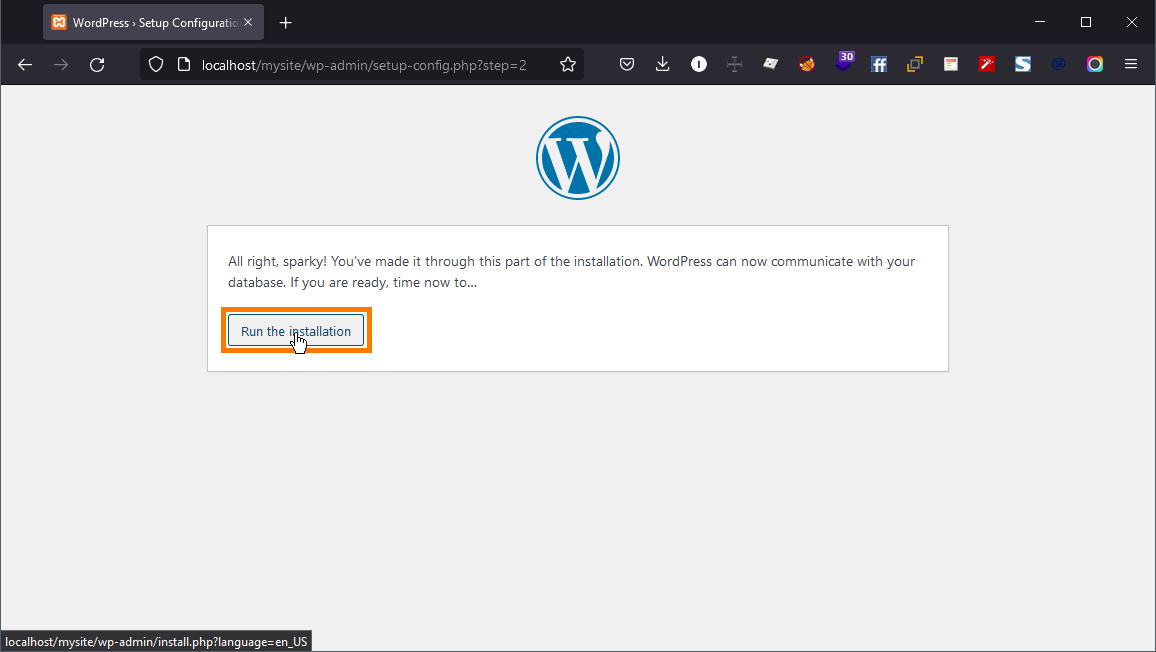
Click on run the installation to begin the process of installing wordpress on XAMPP Server.
Next, WordPress will ask you to provide information about your website, first enter the title you want to use for this site.
After that, you need to enter a username, password, and email address for your admin account.
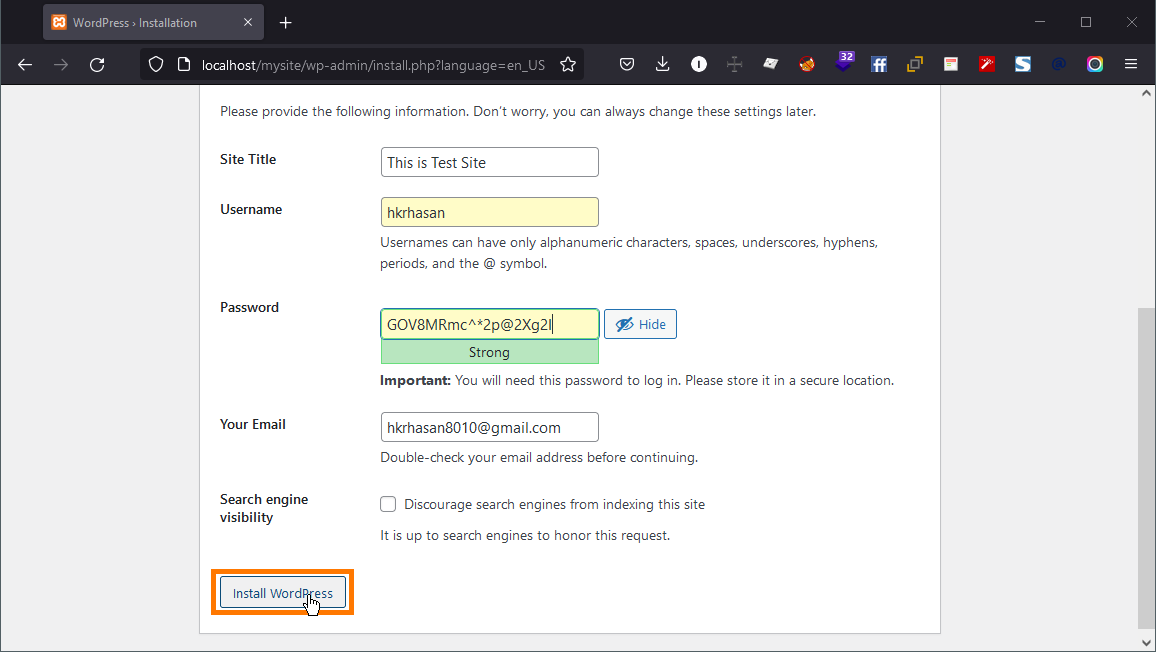
Once you have filled all the information, click on the install WordPress button to continue
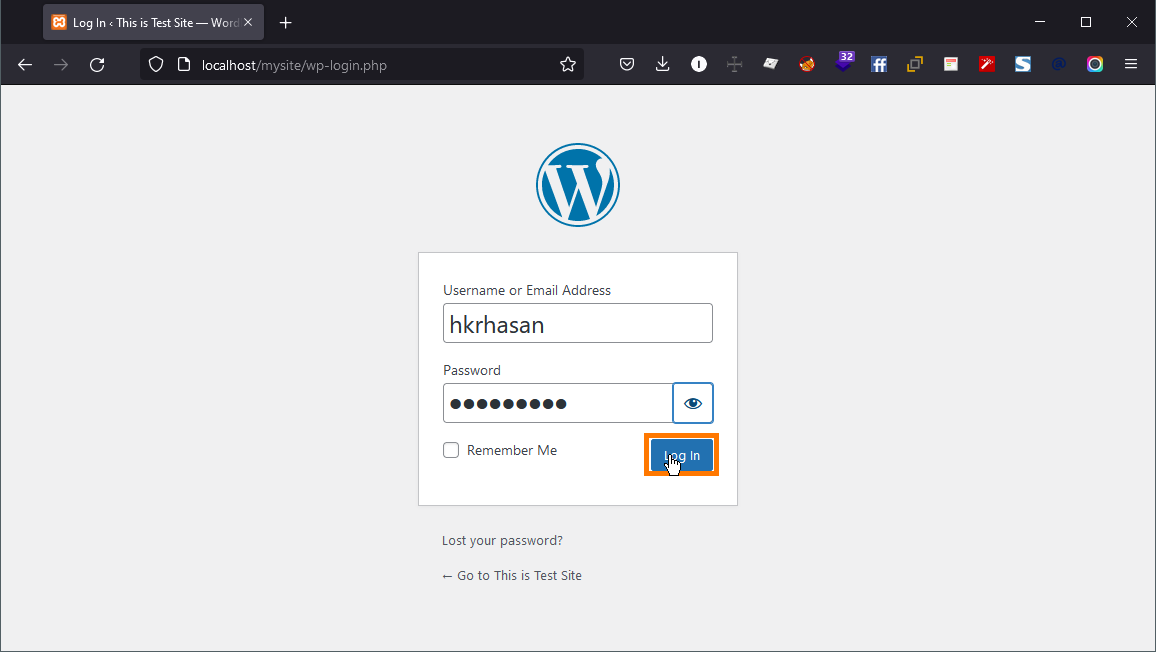
WordPress will now run the installation and prompt you to log in once it's done.
You can login to your website by going to http://localhost/FOLDERNAME:/wp-admin page and use the username and password that you entered during installation to login.
Congrats, you’ve successfully installed WordPress on your XAMPP server.