HTML Form input `type` Attribute
HTML Input type Attribute
The HTML input element is used to create interactive controls for web-based forms to accept data from the user. Data can be entered by the user in various forms, like in alphabets, in digits or combination of both like an email. These different kind of HTML input elements in HTML defines the type of data a user would enter in the input field. It makes easier for the browser to understand what data is valid to be entered in particular field and what is not.
The different types of HTML input type are specified by its type attribute, each input type has different type attribute value associated with it. Let's see the common values of type attribute:
Here is a list of some common HTML Form input types:
<input type="button"><input type="checkbox"><input type="color"><input type="date"><input type="datetime-local"><input type="email"><input type="file"><input type="hidden"><input type="image"><input type="month"><input type="number"><input type="password"><input type="radio"><input type="range"><input type="reset"><input type="search"><input type="submit"><input type="tel"><input type="text"><input type="time"><input type="url"><input type="week">
Note: The default value of the
typeattribute is "text" .
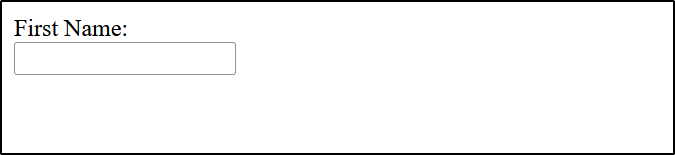
HTML Input type="text"
The <input type="text"> defines a single line text input field. By default a field text can take 20 characters.
<form>
    <label for="fname">First Name: </label><br>
    <input type="text" id="fname" name="fname">
</form>
This is how the HTML code above will be displayed in a browser:

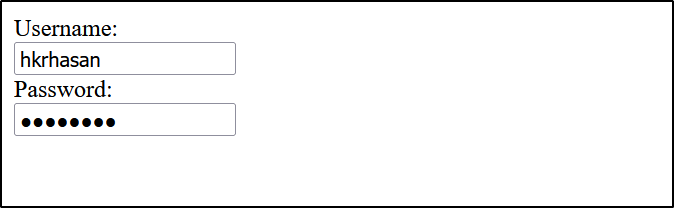
HTML Input type="password"
The <input type="password"> defines a password field. It will show bullets in place of actual characters during input.
<form>
    <label for="username">Username: </label><br>
    <input type="text" id="username" name="username"></br>
    <label for="pass">Password: </label><br>
    <input type="password" id="pass" name="pass">
</form>
This is how the HTML code above will be displayed in a browser:

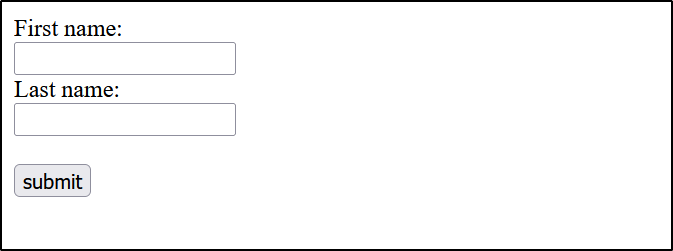
HTML Input type="submit"
The <input type="submit"> defines a submit button that submit form data to a form-handler.
The form-handler is a type of server page with a script for processing form input data and it is specified in the form's action attribute
<form action="/action_page.php">
    <label for="fname">First name: </label><br>
    <input type="text" id="fname" name="fname"><br>
    <label for="lname">Last name:</label><br>
    <input type="text" id="lname" name="lname"><br><br>
    <input type="submit" value="submit">
</form>
This is how the HTML code above will be displayed in a browser:

HTML Input type="reset"
The <input type="reset"> defines a reset button.
If you want to change the input values then click the Reset button, the form data will be reset to the default values.
<form action="/action_page.php">
    <label for="fname">First name:</label><br>
    <input type="text" id="fname" name="fname"><br>
    <label for="lname">Last name:</label><br>
    <input type="text" id="lname" name="lname"><br><br>
    <input type="submit" value="submit">
    <input type="reset">
</form>
This is how the HTML code above will be displayed in a browser:

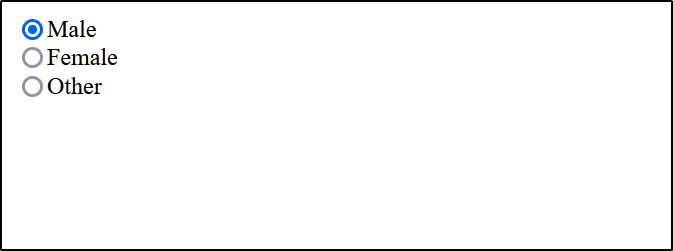
HTML Input type="radio"
The <input type="radio"> defines a radio button. It is used where only one option out of many has to be selected. The name attribute in all the buttons should have the same value, then only a distinct value will get selected. The radio buttons let a user select only one of a limited number of choices.
<form action="action-page.php">
    <input type="radio" name="gender" value="male" checked>Male<br>
    <input type="radio" name="gender" value="female">Female<br>
    <input type="radio" name="gender" value="other">Other<br>
</form>
This how the HTML code above will be displayed in browser:
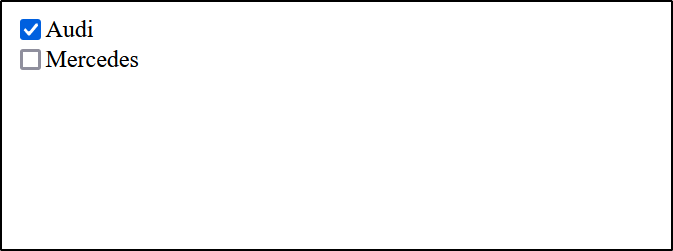
HTML Input type="checkbox"
The <input type="checkbox"> defines a checkbox. It can be used to select multipl option at a time.
<form action="action-page.php">
    <input type="checkbox" name="car" value="audi" checked>Audi<br>
    <input type="checkbox" name="car" value="mercedes">Mercedes<br>
</form>
This is how the HTML code above will be displayed in a browser:
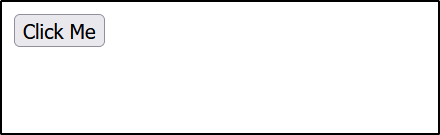
HTML Input type="button"
The <input type="button"> defines a button
<form>
    <input type="button" onclick="alert('Hello World!');" value="Click Me">
</form>
This is how the HTML code above will be displayed in a browser:

HTML Input type="color"
The <input type="color"> is used for input fields that should contain a color.
Depending on browser support, a color picker can show up in the input field.
<form>
    <label for="favcolor">Select your favorite color: </label>
    <input type="color" id="favcolor" name="favcolor">
</form>
HTML Input type="date"
The <input type="date"> is used for input fields that should contain a data.
Depending on browser support, a date picker can show up in the input field.
<form>
    <label for="birthday">Birthday: </label>
    <input type="date" id="birthday" name="birthday">
</form>
you can also use the min and max attribute to add restrictions to dates:
<input type="date" min="2000-01-02">
HTML Input type="datetime-local"
The <input type="datetime-local"> specifies a date and time input field, with no time zone.
Depending on browser support, a date picker can show up in the input field.
<form>
    <label for="birthdaytime">Birthday (date and time): </label>
    <input type="datetime-local" id="birthdaytime" name="birthdaytime">
</form>
HTML Input type="email"
The <input type="email"> is used for input field that should contain an e-mail address.
Depending on browser support, the e-mail address can be automatically validated when submitted.
Some smartphones recognize the email type, and add ".com" to the keyboard to match email input.
 <form>
    <label for="email">Enter your email:</label>
    <input type="email" id="email" name="email">
</form>
HTML Input type="file"
The <input type="file"> defines a file-select field and a Browse button for file uploads.
 <form>
    <label for="myfile">Select a file:</label>
    <input type="file" id="myfile" name="myfile">
</form>
HTML Input type="number"
The <input type="number"> defines a numeric input field. The number attribute set restrictions on what numbers are accepted. You can set the min or max number.
 <form>
     <label for="quantity">Quantity (between 1 and 5):</label>
     <input type="number" id="quantity" name="quantity" min="1" max="5">
</form>
This is how the HTML code above will be displayed in a browser:


HTML Form Input Restrictions
Here is a list of some common input restrictions:
| Attribute | Description |
|---|---|
| checked | Specifies that an input field should be pre-selected when the page loads (for type="checkbox" or type="radio") |
| disabled | Specifies that an input field should be disabled |
| max | Specifies the maximum value for an input field |
| maxlength | Specifies the maximum number of character for an input field |
| min | Specifies the minimum value for an input field |
| pattern | Specifies a regular expression to check the input value against |
| readonly | Specifies that an input field is read only (cannot be changed) |
| required | Specifies that an input field is required (must be filled out) |
| size | Specifies the width (in characters) of an input field |
| step | Specifies the legal number intervals for an input field |
| value | Specifies the default value for an input |